Guide/Walk Through
January 18, 2019 Version 1.0
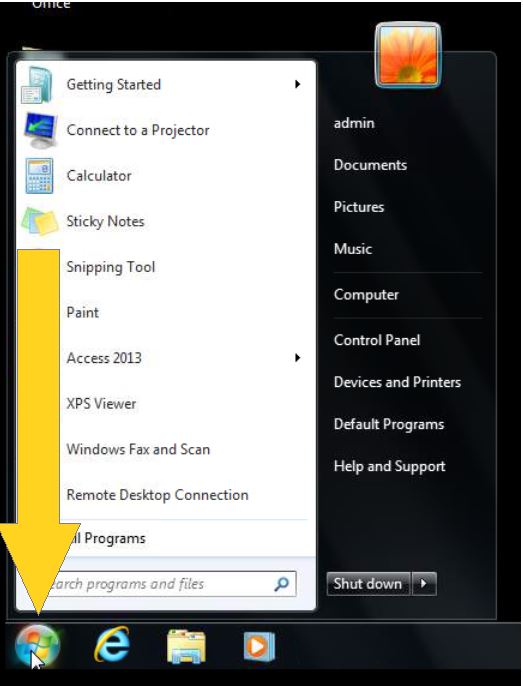
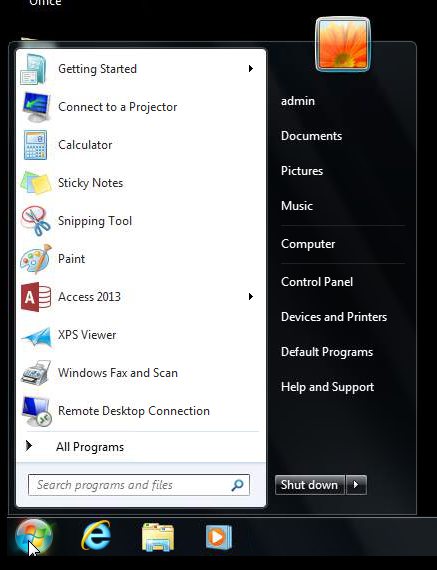
- Go to the Windows Logo or Press the Window Key as shown in Figure 1.1
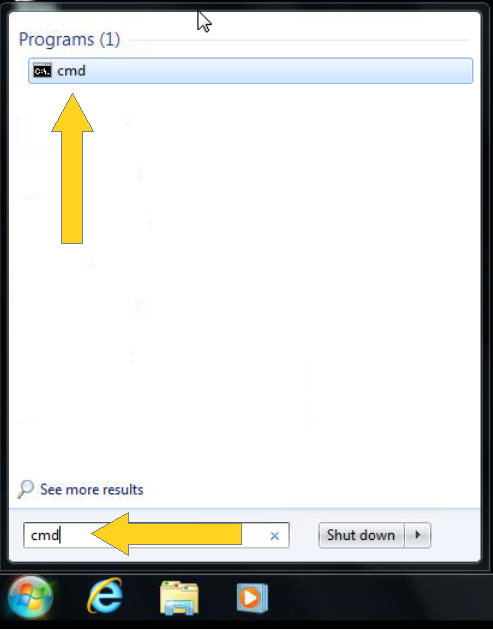
2. Type “cmd” or “Command Prompt” in the search bar and click the “cmd” or “Command Prompt” Program as show in Figure 1.2
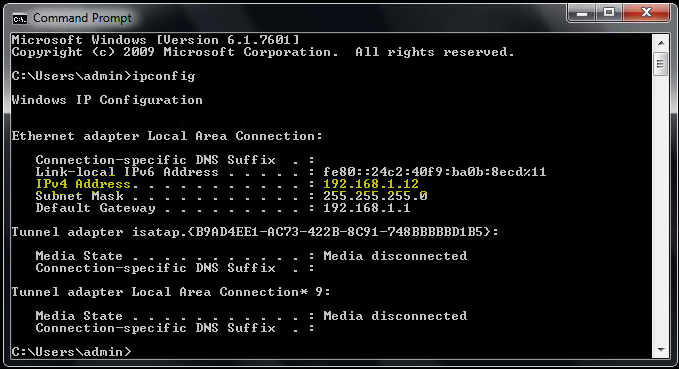
3. Command Prompt will pop-up and type “ipconfig” then Press ENTER as shown in Figure 1.3
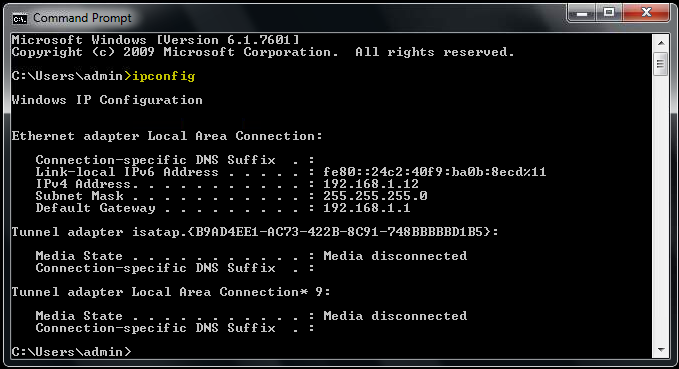
4. Now look for “Ipv4 Address . . . . . . .” then the number next to it is the IP Address of your computer as shown in Figure 1.4
II. Using Network Settings
- Go to your desktop and look for the “Network” Icon in the task bar as shown in Figure 2.1

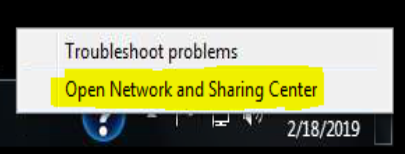
2. Right Click on the Icon and Click the “Open Network and Sharing Center” as shown if Figure 2.2
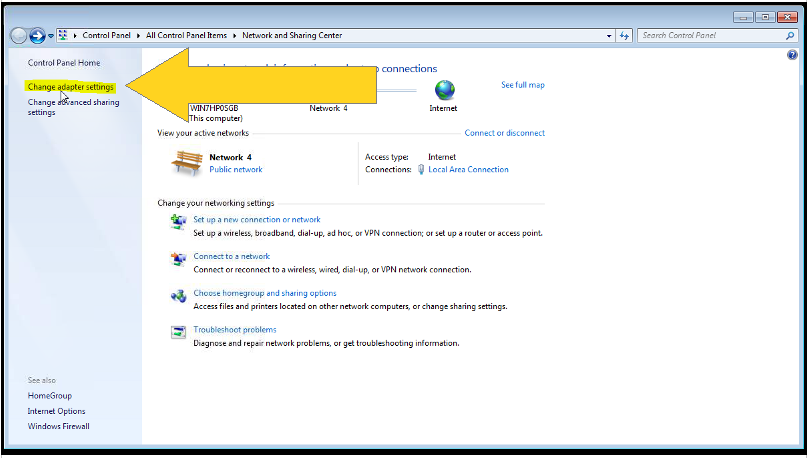
3. Network and Sharing Center will pop-up. Look for “Change adapter settings” and Click it as show in Figure 2.3
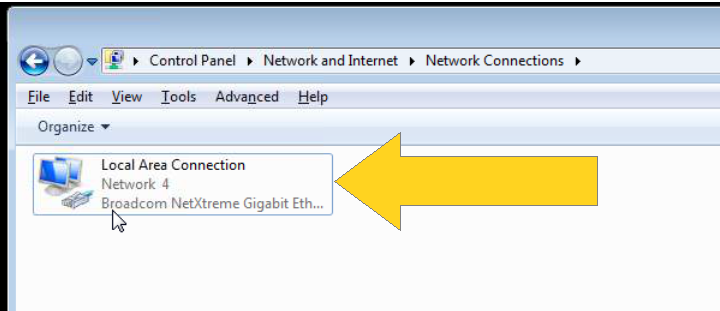
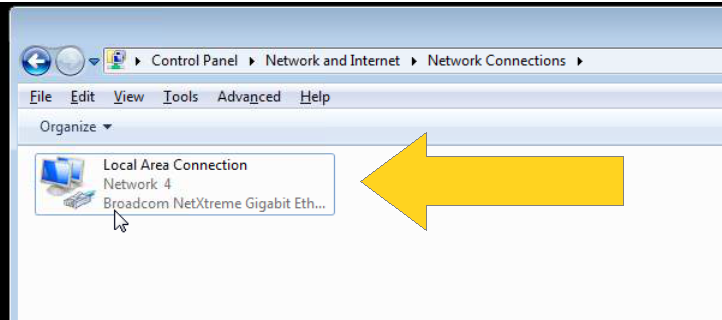
4. Look for “Local Area Connection” and Double Click it as shown in Figure 2.4
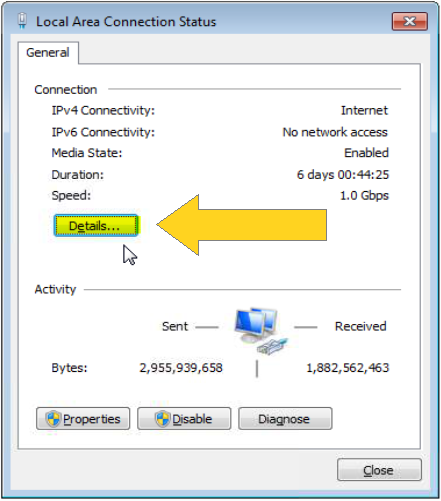
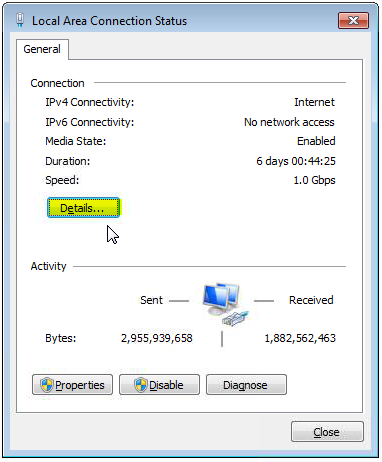
5. Local Area Connection Status will pop-up. Look for “Details…” and Click it as shown in Figure 2.5
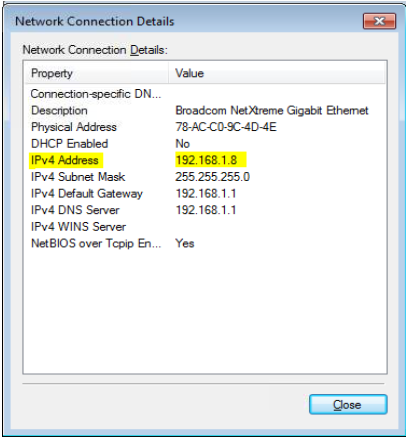
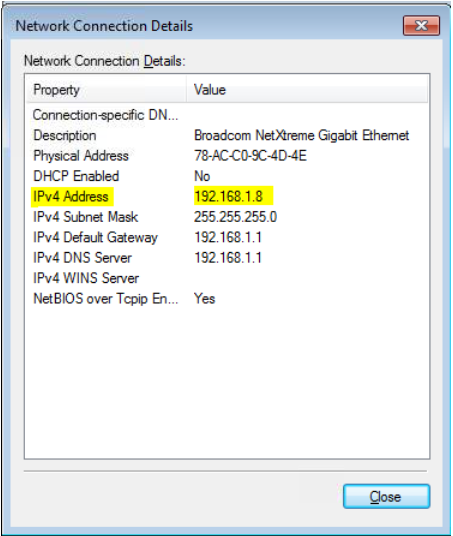
6. Network Connection Details will pop-up. Look for “Ipv4 Address” then the number next to it is the IP Address of your computer as shown in Figure 2.6
III. Using “ncpa.cpl”
- Go to the Windows Logo or Press the Window Key as shown in Figure 3.1
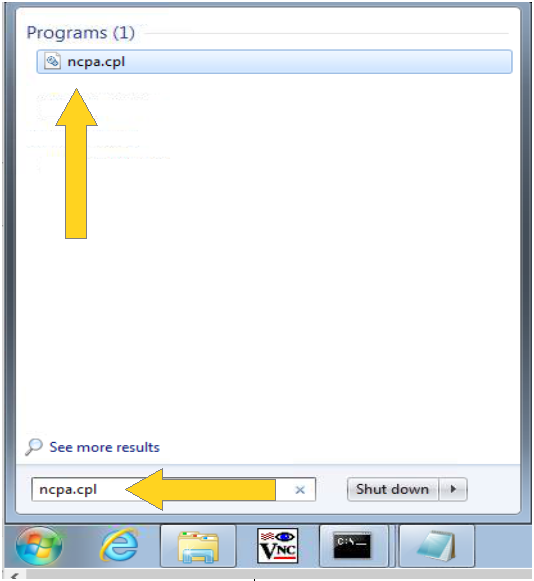
2. Type “ncpa.cpl” in the search bar and click the “ncpa.cpl” Program as show in Figure 3.2
3. Look for “Local Area Connection” and Double Click it as shown in Figure 3.3
4. Local Area Connection Status will pop-up. Look for “Details…” and Click it as shown in Figure 3.4
5. Network Connection Details will pop-up. Look for “Ipv4 Address” then the number next to it is the IP Address of your computer as shown in Figure 3.5