PAPER RA MAIN SCREEN
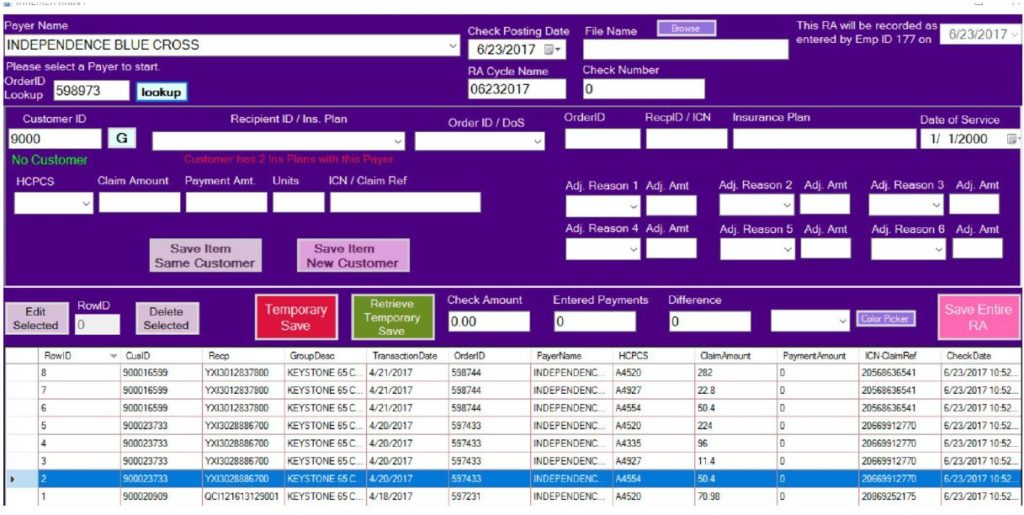
To get to the PAPER RA MAIN Screen

PARTS of THE PAPER RA
PROCEDURE
- Log into the new billing workstation, click the enter page RA button.
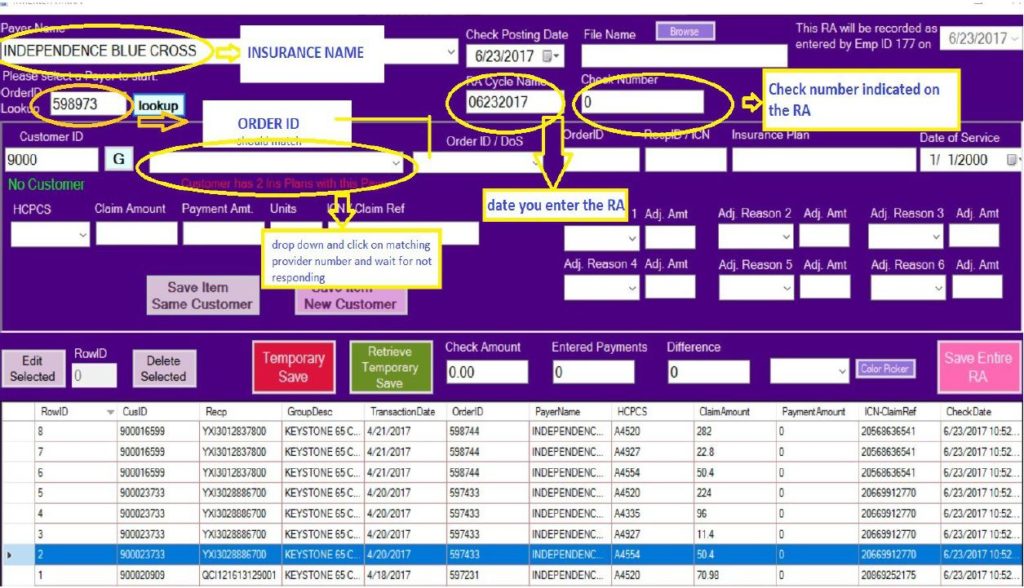
- Payer name – Use the drop down box to select the payer name that you are going to enter the paper RA for.
- RA Cycle Name – Use today’s date as the RA cycle name (Ex. 06222017). If you have more than one RA with the same payer just add a 1, 2 or 3 at the end of the date (Ex. 062220171).
- Check Number – Use the check number the insurance company gives you, if you are entering a denial, add a zero as the check number.
- Check Amount – Enter the check amount the insurance company gives you, if you are entering a denial, use zero as the check amount.
- Order ID Look Up – If the RA has the customer ID (9000 #) bring the consumer up with customer ID number then select G.
- Recipient ID/ Ins. Plan – Use the drop down box to select the insurance you are posting the RA response too.
- Order ID – Use the drop down box to select the order ID you are posting, the RA response to response too.
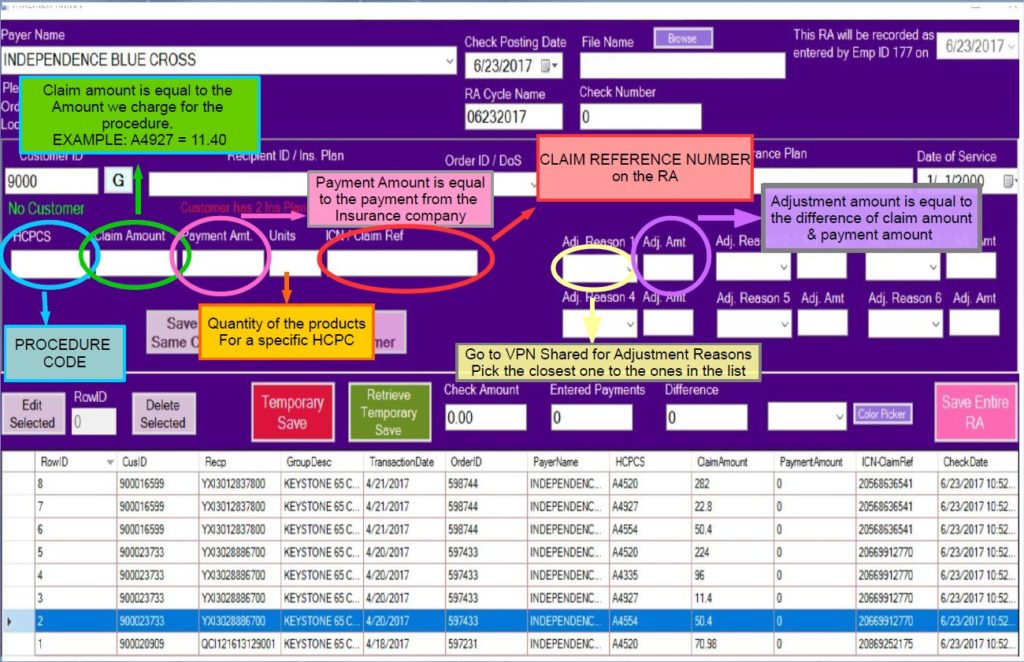
- HCPCS – Use the drop down box to select HCPCS code you are going to post first.
- Claim Amount – The claim amount will either populate for you or you will have to add the amount we billed to the insurance company for that line item.
- Payment Amount – Enter the payment amount the insurance company made to that line item.
- Units – The units will either populate for you or you will have to add the units in which we billed to the insurance company.
- INC/Claim Ref – Add in the claim INC/Claim Ref number the RA gives you.
- Adjustment Reasons – Add the adjustment reasons the RA gives you.
*Save item same customer – This button allows you to enter more of the line items that share the same Icn/Claim ref.
*Save item new customer – This button saves your recent posting and allows you to start a new posting without using the same claim ref #.
– This button allows you to temporary save you posting that you can come back to tomorrow or at a later date. Make sure you keep RA Cycle Name, check number and check amount.
*Retrieve Temporary Save – This button allows you to retrieve your temporary saved RA. You will have to enter your temporary saved RA Cycle Name, Check number and check amount then press the Retrieve Temporary Save button.
*Save Entire RA – To permanently save a you will press the Save Entire RA button, beware that once you select this button there is no changes that can be made to that RA.