Setup Guide For Production
Feb 3, 2019 Version 1.0
@2019 MSI LLC All
Rights Reserved
IT Department
- To create Mapping for VPNShared file server go to run and type \\I.P. Address and hit ENTER.
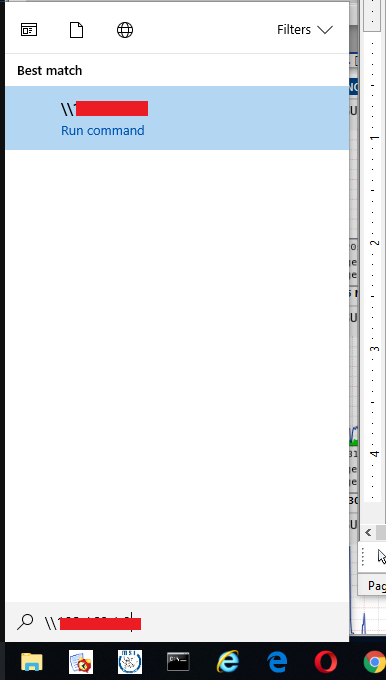
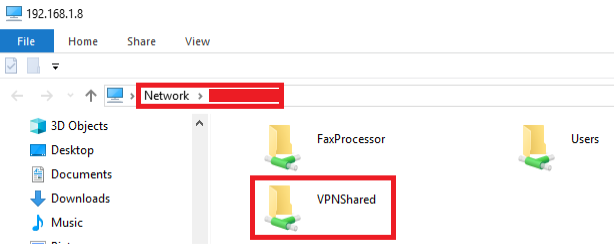
2. You will see new open window indicated the I.P. Address of the Fileserver and VPNShared folder.
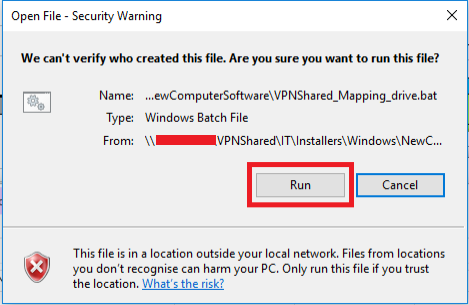
3. Double click the VPNShared folder > IT > Installers > Windows > NewsComputerSoftware and locate VPNShared_Mapping_drive.bat file.
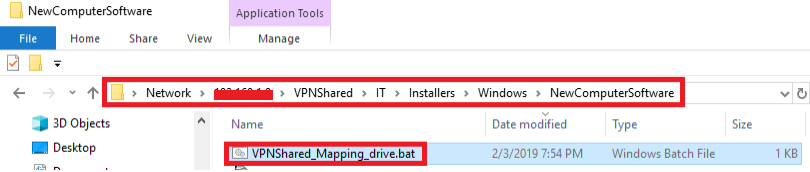
4. Double click the VPNShared_Mapping_drive.bat and hit Run Button.
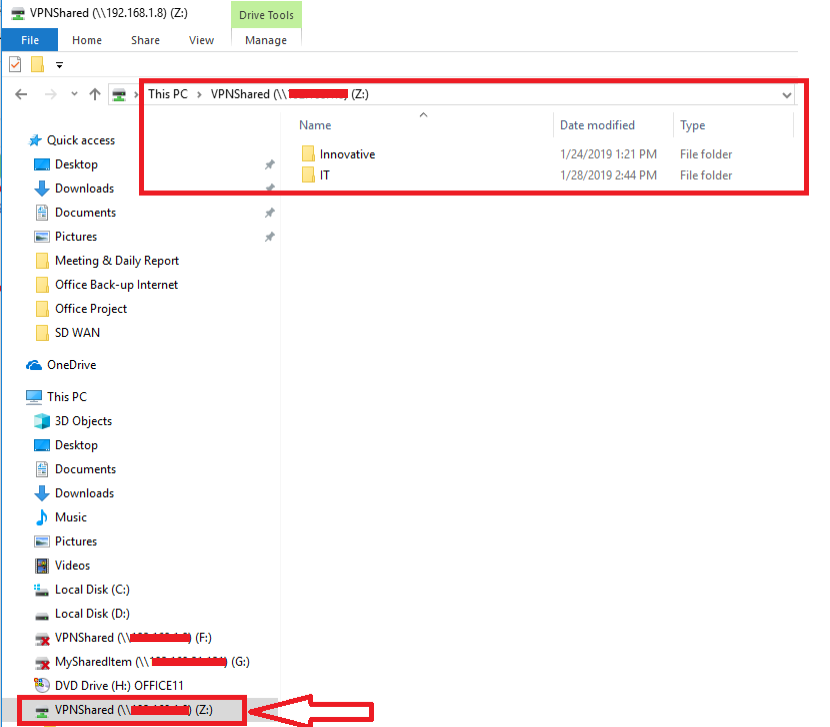
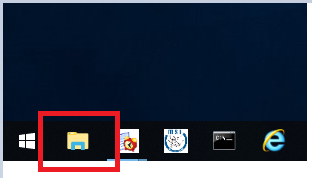
5. After hitting the Run Button Go to File explorer indicated in Figure 5.
6. Double clicking This PC computer will see VPNShared file folder is already Map in your workstation.
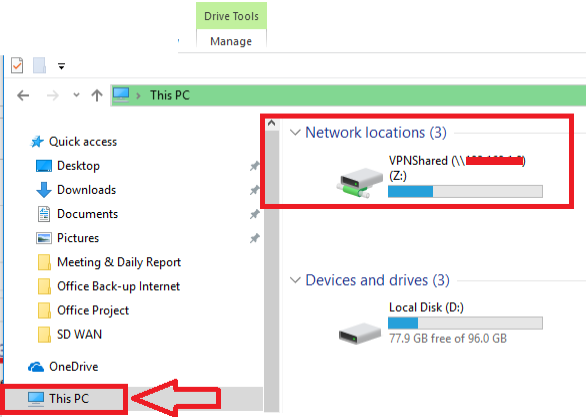
7. By double clicking the VPNShared mapping you can directly access the VPNShared folder.