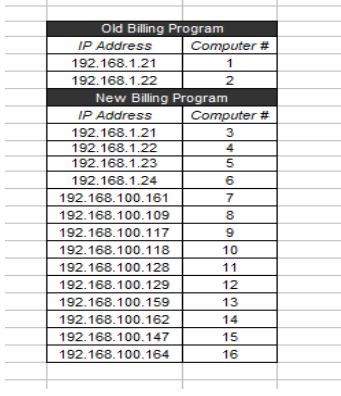
1. The New Billing Program is installed in the Administrator Account of the US computers, IP Address listed below. This program may run simultaneously while Old Billing System is also prebilling orders. The assignment of computer #s depends on the availability of the computers. In order to initiate the new program, you would have to remote in to each PC.
2. The program is displayed in each desktop. Look for this icon:

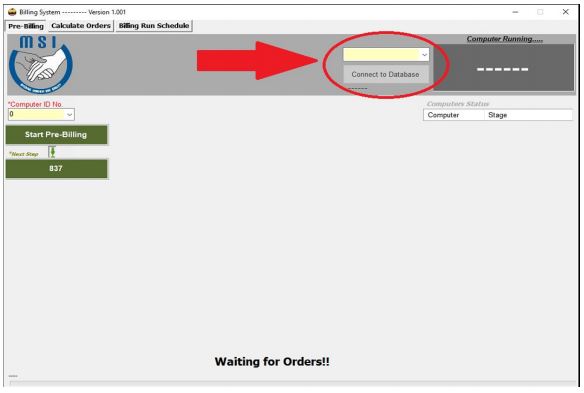
3. Open the program. The landing page is where you connect to the Database.
Select “REAL” from dropdown.
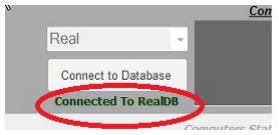
4. You know you are in the Real Database when you see “Connected to RealDB”
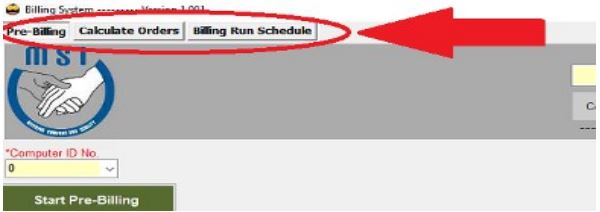
5.The landing page has three subtabs — Prebilling, Calculate Orders and Billing Run Schedule.
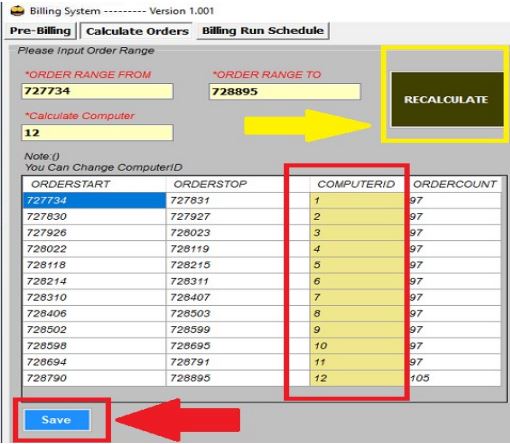
6. Once connected to the Real Database, hit the “CALCULATE ORDERS”, input the order range, and determine how many computers you’d like it to run to prebill.
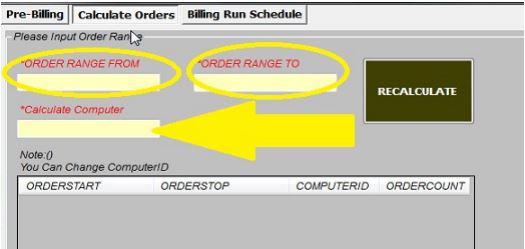
7. Hit “RECALCULATE”. The program will equally assign orders to each computer. Refer to the computer number assignment indicated in Step #1 if you wish to use Old and New Billing Program simultaneously. Then hit “SAVE”.
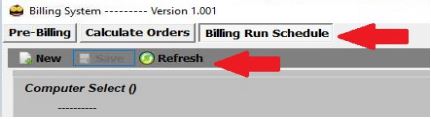
8. Next, go to “BILLING RUN SCHEDULE”. This is the same table that we use to go to when we operate the Old Billing Program. Make sure to input the correct Day and Hour to run Prebill. Hit “REFRESH” to refresh the table.
“Waiting” status means it is ready to start prebilling.
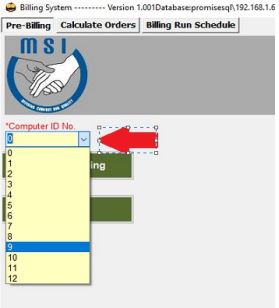
9. Once Billing Run Schedule is set, process to “PREBILLING” Tab.
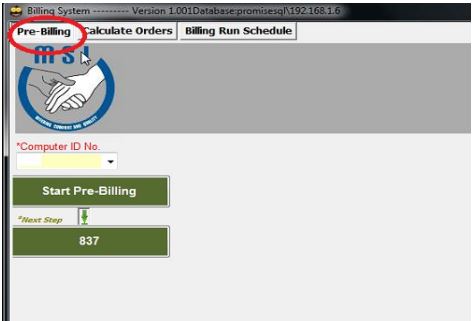
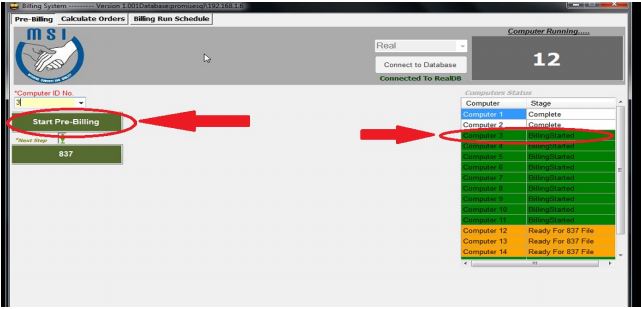
10. Select the Computer ID number assigned for the computer you’re remoting in.
11. Hit “START PRE-BILLING”. The program is designed to fix NA*, RDN and ADN issues immediately after hitting this button. This only takes a few mins to run and once it is done, it will automatically proceed to Prebilling. The status should switch to “Billing Started” from “Waiting”.
12. REPEAT STEPS 9, 10 AND 11 by remoting in to other computers until you have set all the computers #s to run Prebilling.