The QuickBooks Import Excel & CSV toolkit contains documentation and examples to help you successfully import Excel and CSV files into QuickBooks. This toolkit is intended to supplement the QuickBooks Help Topic “Importing data from Excel or a CSV file.”
If you do not have a large amount of list data to import, it may be easier to enter the lists into QuickBooks manually. Any list import format brings some complexity, although it is minimal with the Import from Excel and CSV feature.
While it is possible to create and use CSV files with any text editor, this document assumes use of Microsoft Excel as the editor. Basic user proficiency with Microsoft Excel is also assumed.
Importing from Excel and CSV files is one of three data import methods available for QuickBooks:
- Intuit Interchange Format (IIF) imports both transactions and lists. IIF is a tab delimited import text file. For more information, including links to sample files and instructions, refer to Data that can be imported or exported using IIF files.
- QuickBooks Software Developer’s Kit (SDK) imports transactions and lists, and dynamically interacts with the data file. The QuickBooks SDK has great capability and flexibility. It is best for programmers and developers that are familiar with XML and want to create import applications. Visit the Intuit Developer Network Web site for more information or to download the QuickBooks SDK. ONLY QuickBooks 2002 and later support this import method.
- Import from Excel and Comma Separated Values (CSV) can only import lists. Transactions cannot be imported using this method. Importing from Excel and CSV uses field mapping between QuickBooks and the import file to identify what data goes where in a QuickBooks list record. In QuickBooks this import function is accessed by clicking File > Utilities > Import Excel Files. Do not confuse importing from Excel and CSV with IIF import. Although IIF import files are often created using a spreadsheet program like Excel, IIF files use a completely different format.
This document ONLY discusses Excel (XLS or XLSX) and Comma Separated Value (CSV) list importing. Before proceeding, make sure that importing from Excel or CSV will meet your needs.
Additional information about importing data into QuickBooks can be obtained from the QuickBooks Help Index, by visiting http://www.QuickBooks.com/support, and in the QuickBooks Community Forum titled Importing and Exporting Data.
Overview
This document supplements the QuickBooks Help Topic Importing data from Excel or a CSV file.”
QuickBooks can import customer, vendor, item, and account lists quickly, using simple spreadsheet data saved in the Excel (XLS/XLSX) or Comma Separated Value (CSV) format.
The primary benefit of importing list data using Excel or CSV files versus using IIF files or the SDK is that no special wording or complicated formatting structure is involved. And many software programs offer the ability to export lists to CSV format, which can then be imported into QuickBooks.
Using the Import from Excel feature only requires that you have a spreadsheet that contains your list data. The data must be formatted such that each FIELD (such as Name or Phone Number) is contained in its own COLUMN, and each complete list ELEMENT (such as a customer record) is in its own ROW.
The main difference between using Excel or CSV files to import data is in working with the data before it is imported into QuickBooks. Using an Excel (XLS/XLSX) file, you can save your import file and retain your custom settings such as column width, colors, and fonts. A CSV file is a text file and does not retain any formatting when you save it.
Starting the Import and Mapping Fields
Before you import Excel or CSV files, we recommend that you become familiar with the QuickBooks Help Topic “About importing data from an Excel or CSV file.”
To import Excel or CSV files:
- Select the Filemenu and select Utilities >Import > ExcelFiles.
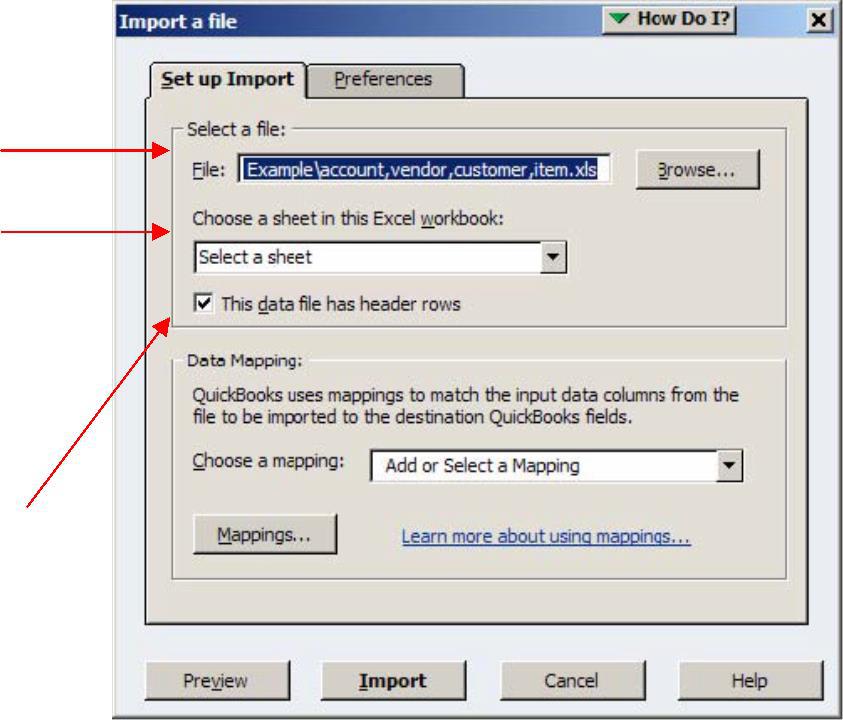
- (QuickBooks Pro/Premier 2008 or Enterprise 8.0 and later only): Click Advanced Import. The Import a file window opens:
3. Click Browse and select the Excel (XLS/XLSX) or CSV file you want to import.
4. (Import from Excel only): Click the drop-down arrow and select which sheet contains data. In the included example XLS file, there are four example worksheets from which to choose: Account, Item, Customer, and Vendor.
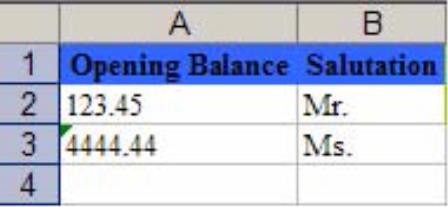
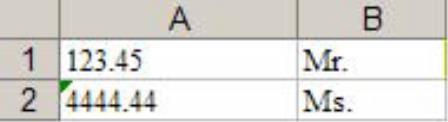
5.Select the checkbox for This data file has header rows based on your data and what appears in ROW 1 of your Excel or CSV file. This checkbox tells QuickBooks whether ROW 1 provides column titles, or whether ROW 1 contains actual data to be imported. Using Header rows is recommended because it makes mapping the fields much easier.
Header row
No header row
6. Click the drop-down arrow for Add or Select a Mapping and select
Mapping us how you tell QuickBooks which columns in the import file contain what data. You do not have to map all column in your import file if there is some data you do not want to import.
You can choose to ignore any column of data that is not required by QuickBooks by simply not mapping that column. The Allowed Fields reference guide included with this toolkit tells you which columns are required by QuickBooks for each list type.

Each mapping you create is saved in your company data file. This is useful if you repeatedly import list data in the same format (such as data exported from another application). You only need to map the fields once. Then the next time you import data in the same format, just click the drop-down arrow and select the mapping you created the first time.
7. Give your new mapping a name. If you will use this mapping again, make sure to enter a descriptive name you will recognize later.
8. Select an Import Type. The choices are Customer, Vendor, Item, or Account.
9.Select a QuickBooks field that you want mapped to a column in your data file and click the drop-down arrow to choose the column in your Excel or CSV file that maps to this field in QuickBooks.
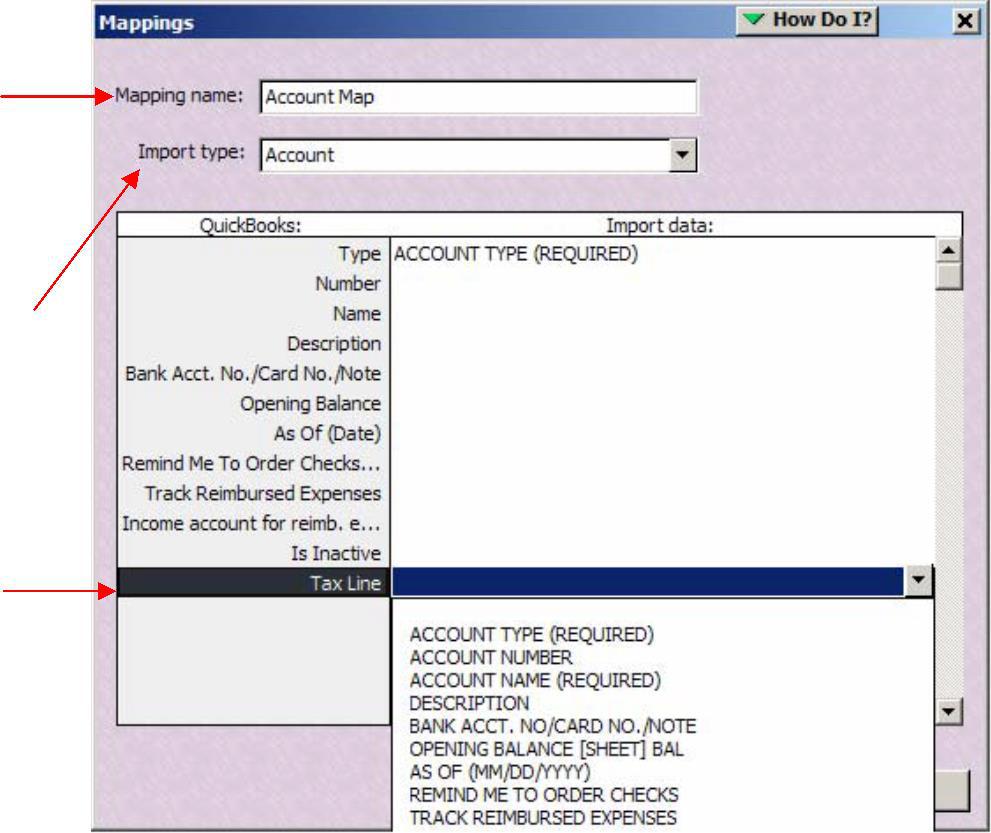
Note: The example in Fig. 3 shows that a header row was used in the import file to name each column of data. If you see only “Column A,” “Column B,” etc., then your data file has no header row. If you want to add a header row to make mapping your data easier, click Cancel twice to close the mapping and import windows. Edit your import file to add a header row at the top, and then start again with Step 1.
10. Repeat step 9 until your mapping is complete, and then click Save.
11. Click the Preferences tab.
12. Choose how you want to handle duplicate records that occur during import.
13. Choose how you want to handle rows with errors during import.
14. Click Preview to see how the first row of data will import into QuickBooks based on the mapping and preferences you selected.
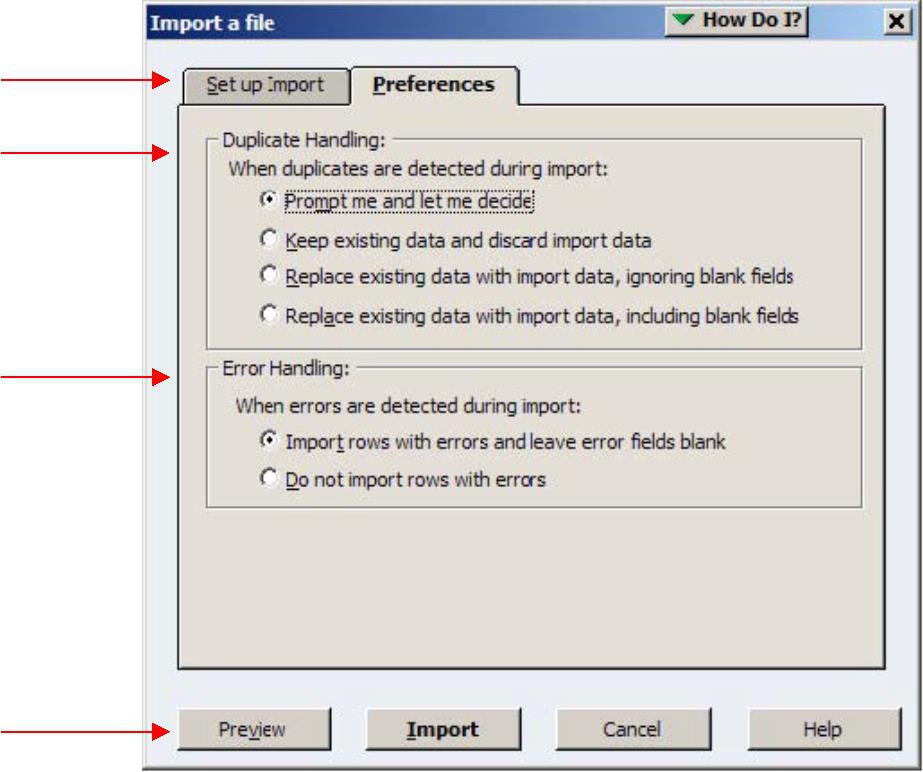
Fig. 5 shows an example of the Preview window:
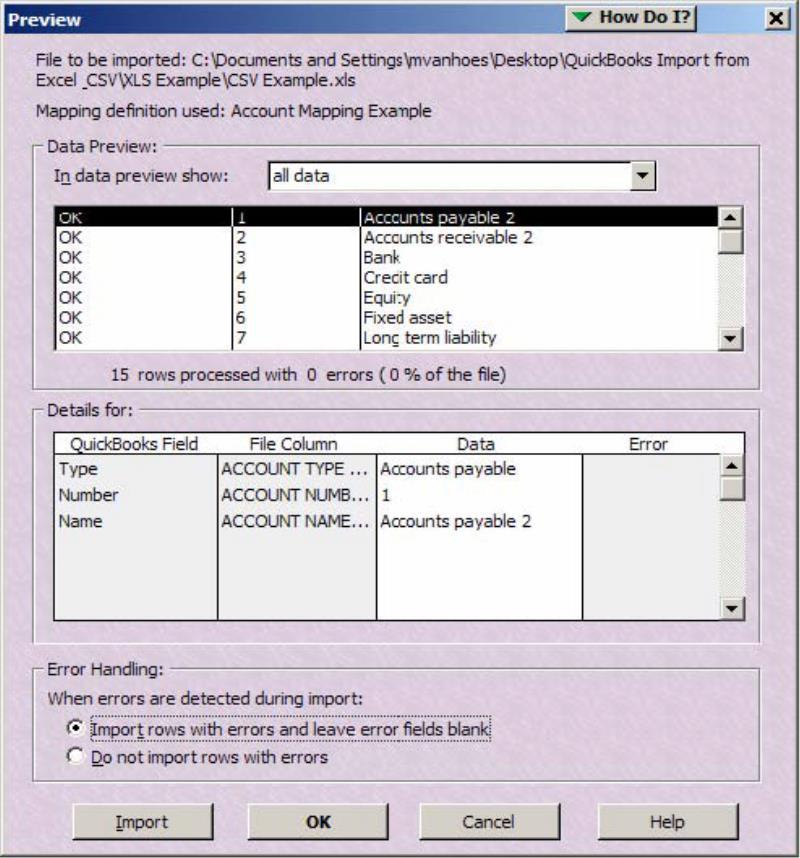
15. If the Preview window reveals a problem with the data mapping, click Cancel and click the Mappings button to make changes.
Tips, Best Practices, and Notes
Do NOT import the examples into your live company file. Use them to practice importing lists into a sample company file.
The contents and formatting of an import file are what is important…not merely its file extension. In Windows, you can change a file extension and the associated program and icon will change. But just changing a filename extension doesn’t change the data format inside it any more than changing the title on a library book will change the contents of the pages. Make sure the Excel (XLS/XLSX) or CSV data you are importing is really XLS/XLSX or CSV formatted. This may require opening the import file in Excel and then re saving it.
In Excel, when you save a CSV file you may receive a warning similar to “The file format you have chosen will not retain formatting.” This message is expected. It is only notifying you that the next time you open the CSV file, any changes you made to column widths or fonts will not be retained. The CSV format is actually a text file with comma separated values, even though the data appears in columns and resembles a spreadsheet file when you view it with Excel.
Back up your company data file BEFORE importing data. There is no Undo function for Importing. If the import does not work as expected, you can restore your backup file and everything will be as it was before you imported any data.
Import Excel or CSV file into a test QuickBooks company file to ensure the import is producing the desired result BEFORE you import it into a live company data file.
If your data contains list elements from other lists, you must create those list items in QuickBooks before importing your data. For example, if your customer data contains a price level, the price level must be added to the QuickBooks Price Level List before you import the customer data. Examples of other list items you may need to create in QuickBooks before importing your data include: Customer/Vendor Types, Terms, Sales Reps, Preferred Send Method, Tax Code, Tax Item, Price Level, Payment/Preferred Payment Method, Job Status, Job Type, Tax Agency, Preferred Vendor, and Accounts.
Notes can only be imported and added to EXISTING list elements. It is not possible to import a new list element and add notes at the same time. This means you cannot create a name and add notes to it while it is being created. Instead, you must import your list of names or accounts in one step, and then import a separate Excel or CSV file containing the notes.
When creating an Excel import file, format all cells in the worksheet as GENERAL (see Excel help for more information).
Sub items, customer:jobs, and sub accounts are represented as parent:sub in an import file. The colon (:) separates the main item from its sub item. For example, John Doe:Job 1 would represent Job 1 for customer John Doe.
If you receive errors when importing an Excel or CSV file, you can save and view the error log. The log will show which ROWS had errors along with a brief explanation of what failed (the actual error). The row errors appear in the column immediately to the right of the original data.
Dates are expressed in the format of MM/DD/YYYY.