Operational Guide
Aug 26, 2019 Version 1.0
A. Setting-up Mozilla Thunderbird
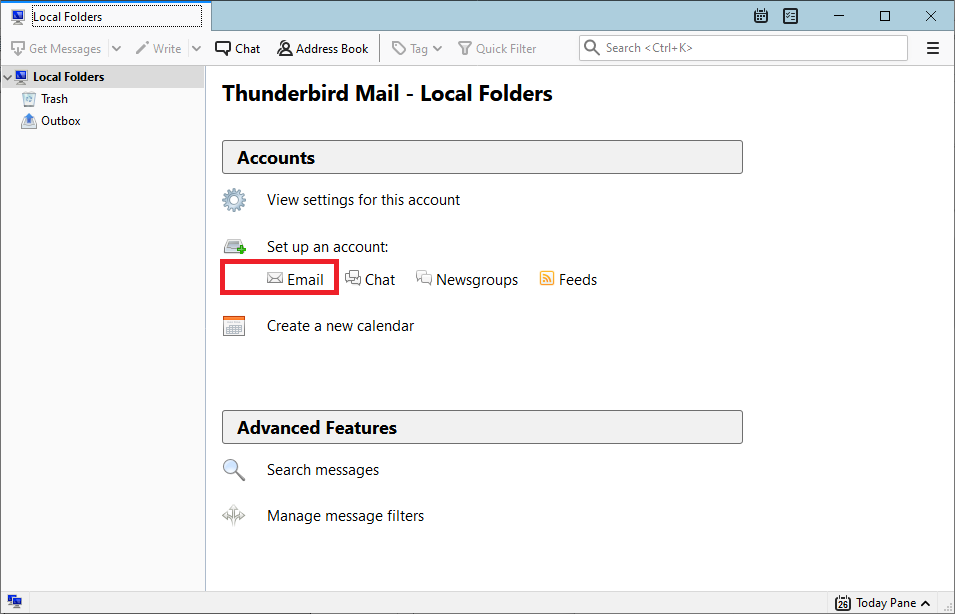
- Open Mozilla Thunderbird. Sometimes the login form won’t show so you need to click the Set up an account: Email
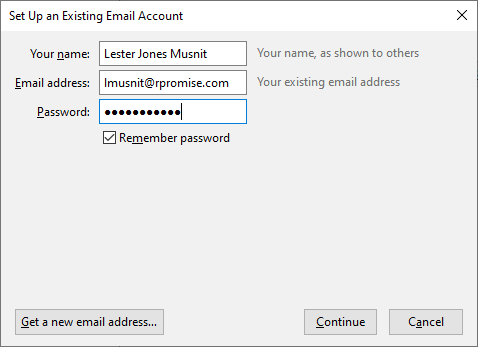
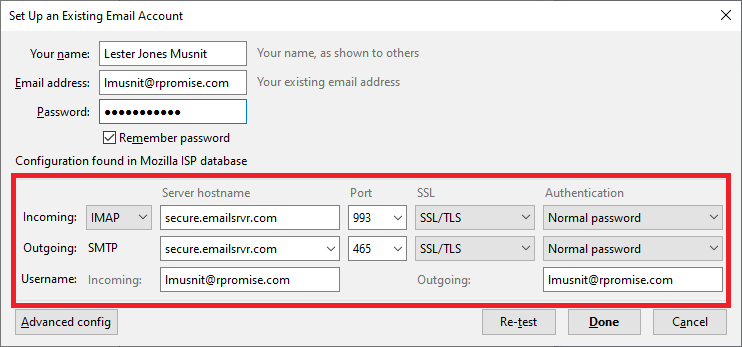
2. Enter your Full name, email, and password. The password of email has pattern. First Letter of your First name and Last name then type this MSI99#!ny. Example: Lester Jones Musnit. My password is LMMSI99#!ny
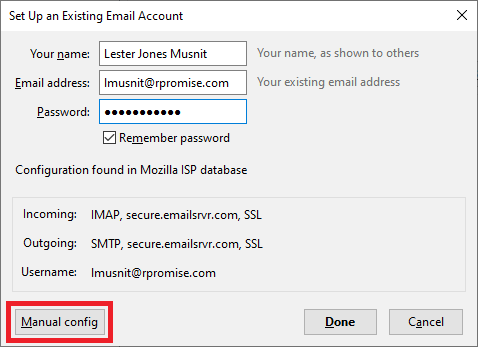
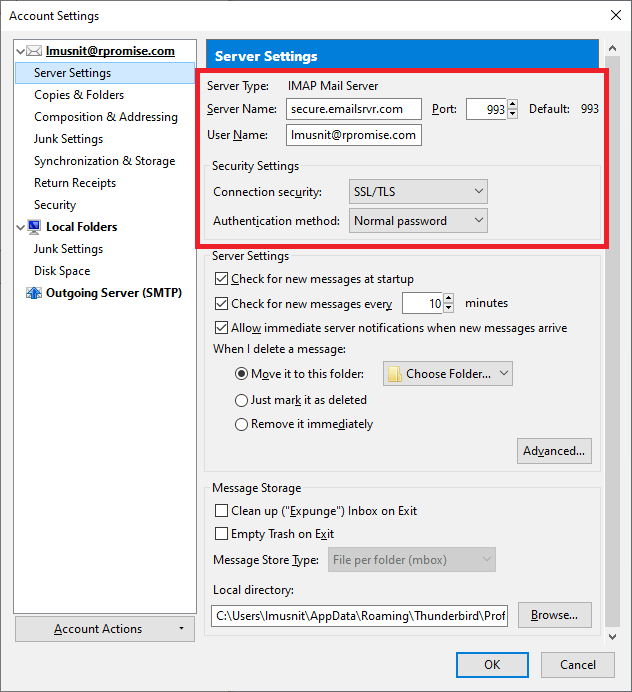
3. Sometimes is getting errors. Make sure that the Incoming is “”IMAP, secure.emailsrvr, SLL” and Outgoing is “SMTP, secure.emailsrvr.com, SSL”. If not, click Manual config.
4. Change the server hostname, port, SSL of incoming and outgoing settings.
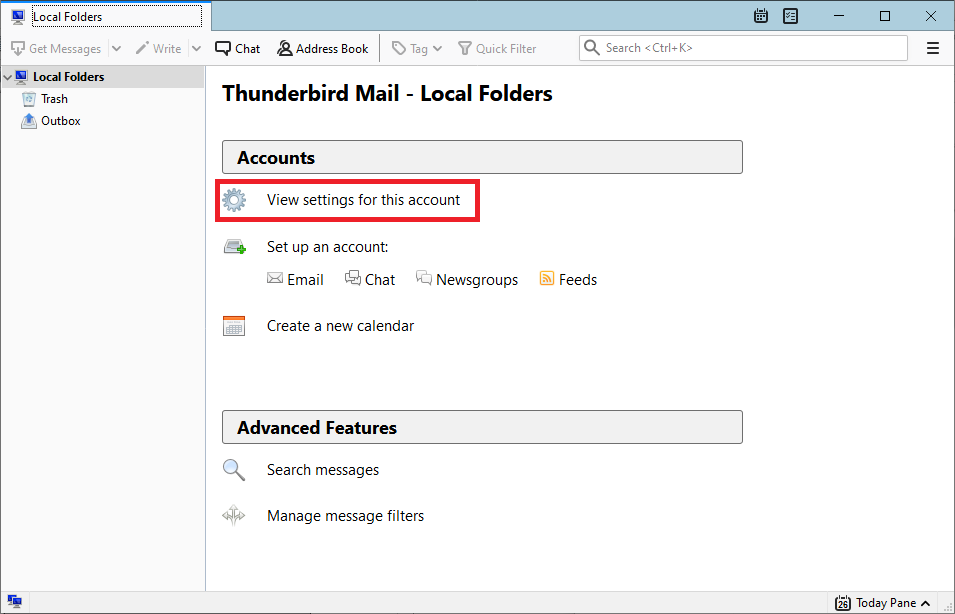
5. To make sure that the changes has been changed, click view settings for this account.
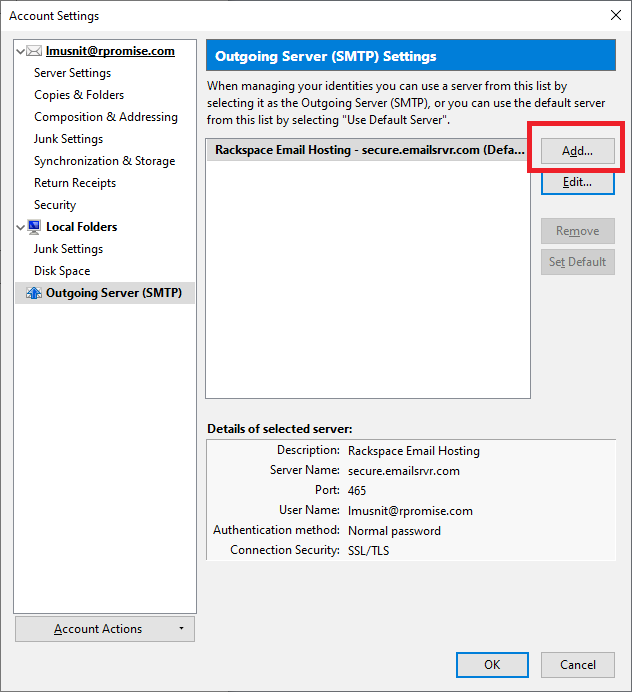
6. If no Outgoing server, click Add
7. Type this to SMTP Server
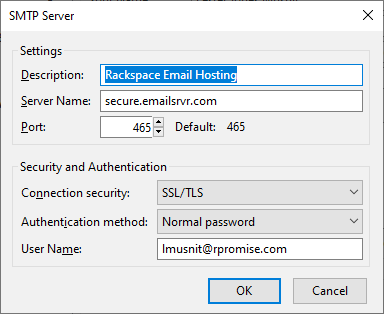
8. Then double check it to your email settings. If not, change it into secure.emailsrvr.com
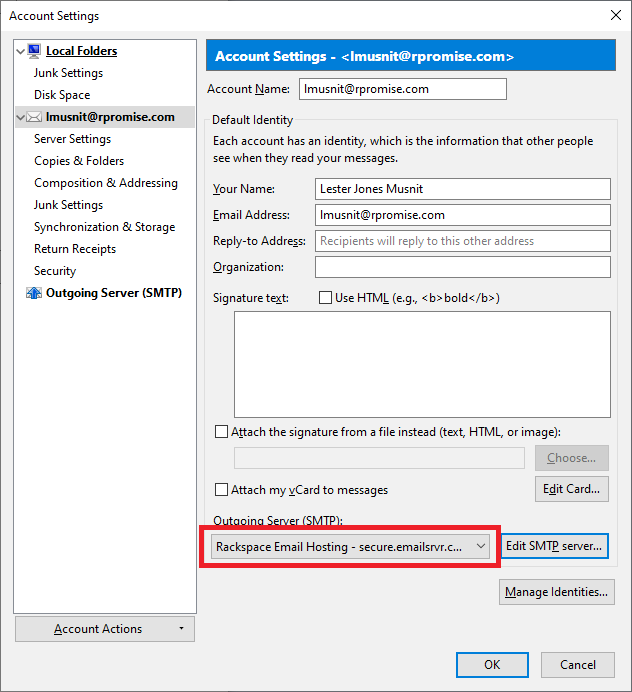
9. In signature text, go to \\192.168.1.9\VPNSharedFileServer\Others\MSISignatureRemarks
10. Next is double check the incoming in server settings then click OK.
11. Once you double checked the Outgoing and Incoming and also you inserted the signature text, it’s all done.
B. Setting-up 3CXPhone for Windows
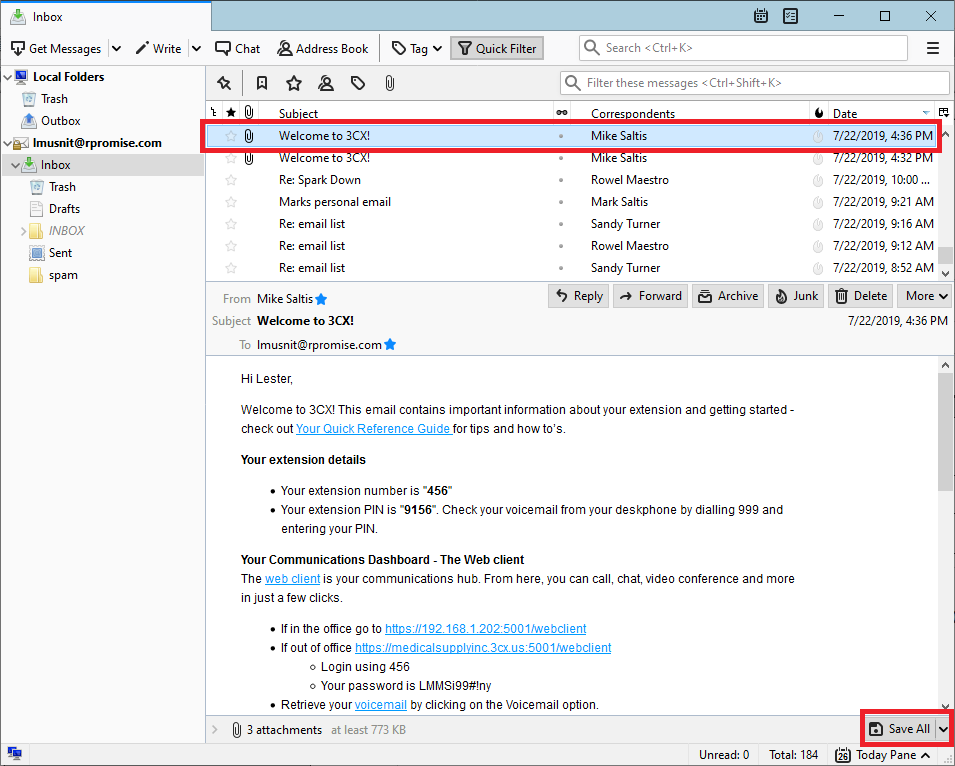
- Open Mozilla Thunderbird and look for “Welcome to 3CX!” subject. Click all the save all attachment into downloads.
2. Double click the configuration file.

3. It is all done.
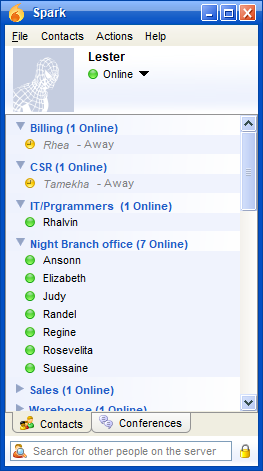
C. Setting-up Spark for Windows
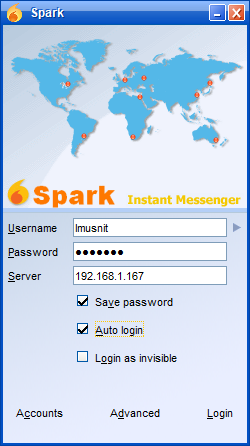
- Open Spark. Type your initial, password and server. The password for Spark is MSI7402. The server is 192.168.1.167. Check the Save password and Auto login.
2. It is all done.