Operational Guide
Aug 26, 2019
A. Troubleshooting MSITime
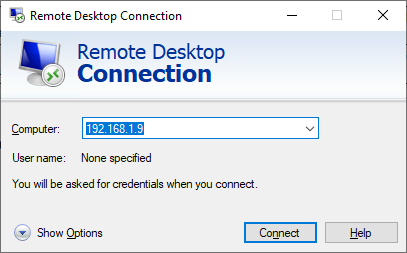
- Open Remote Desktop Connection and type 192.168.1.9
![](http://employee.rpromise.com/wp-content/uploads/2019/09/1-1.png)
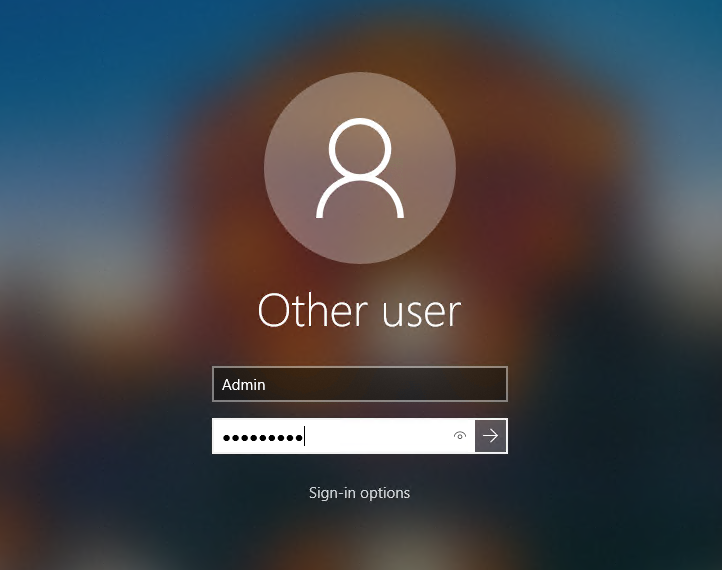
2. Username: Admin, Password: MSIAdmin1
![](http://employee.rpromise.com/wp-content/uploads/2019/09/2-1.png)
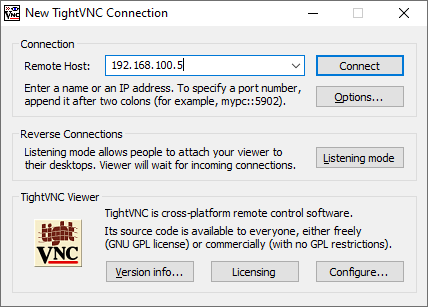
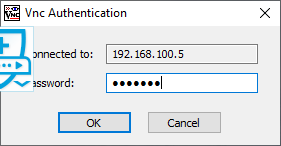
3. Open TightVNC and type 192.168.100.5
![](http://employee.rpromise.com/wp-content/uploads/2019/09/3-1.png)
4. The password is CTB99#!
![](http://employee.rpromise.com/wp-content/uploads/2019/09/4-1.png)
5. Click the ctrl+alt+del in TightVNC to open the logon screen of 100.5
![](http://employee.rpromise.com/wp-content/uploads/2019/09/5-1.png)
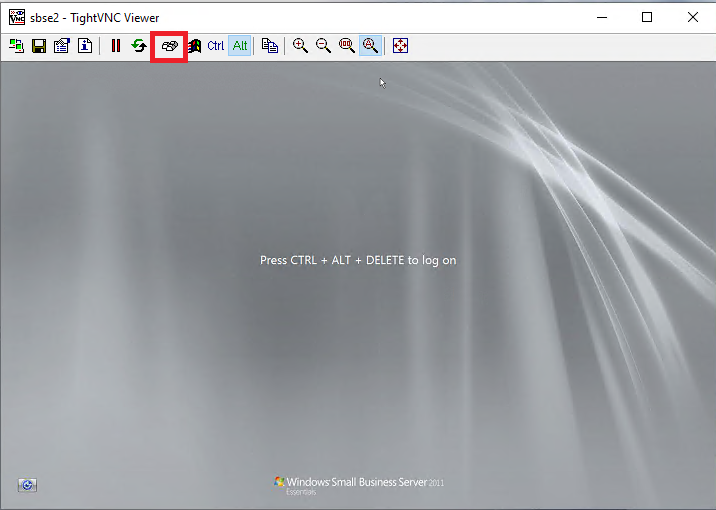
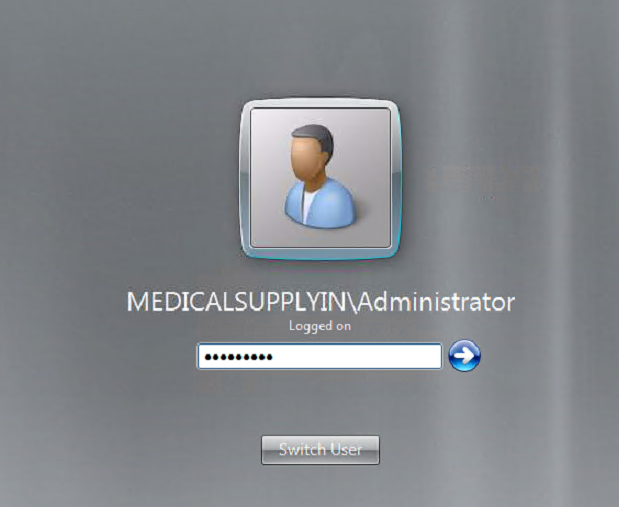
6. If the administrator wasn’t in logon screen, click other user and type “MedicalSupplyIn\Administrator” and the password “MSIAdmin1”
![](http://employee.rpromise.com/wp-content/uploads/2019/09/6-1.png)
7. Click the form1 in the taskbar
![](http://employee.rpromise.com/wp-content/uploads/2019/09/7-1-1024x242.png)
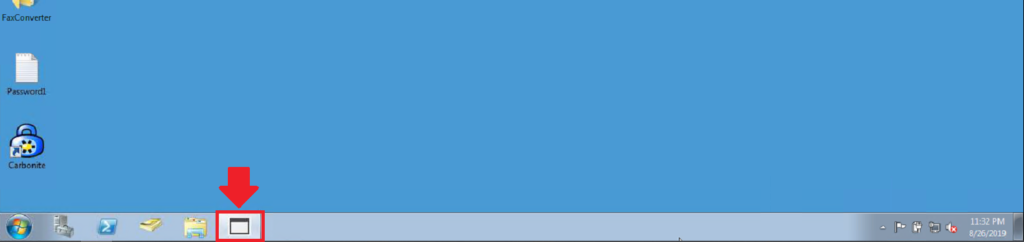
8. Click Start Fax Conversion to start the MSITime
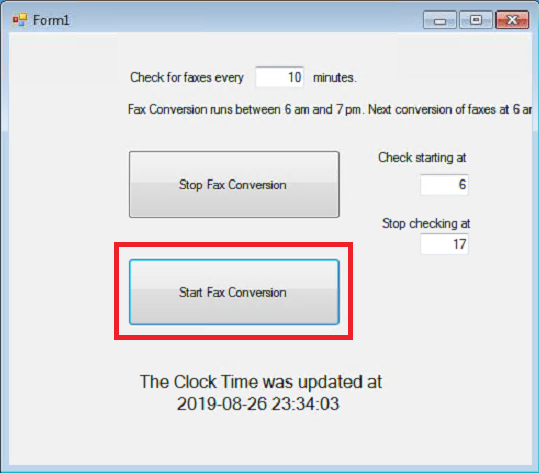
![](http://employee.rpromise.com/wp-content/uploads/2019/09/8-1.png)
9. It is all done.
B. Troubleshooting 3CXPhone for Windows
- Open TightVNC and type 192.168.1.202
![](http://employee.rpromise.com/wp-content/uploads/2019/09/9-1.png)
2. The password is CTB99#!
![](http://employee.rpromise.com/wp-content/uploads/2019/09/10-1.png)
3. Click Start and type “services.msc”
![](http://employee.rpromise.com/wp-content/uploads/2019/09/11-1.png)
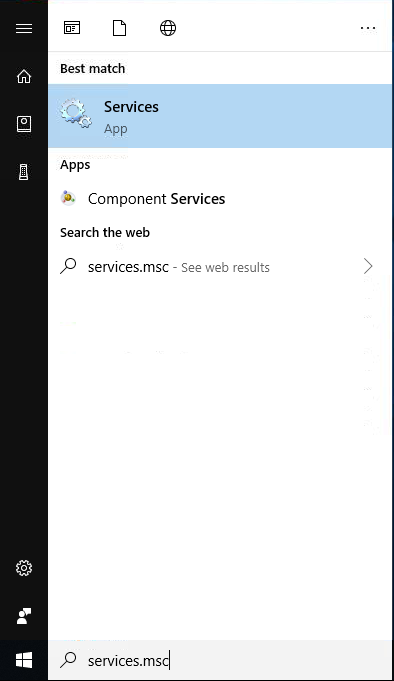
4. Look for 3CX PhoneSystem Nginx Server
![](http://employee.rpromise.com/wp-content/uploads/2019/09/12-1.png)
5. Right click then click Properties. Click Start then OK
![](http://employee.rpromise.com/wp-content/uploads/2019/09/13-1.png)
6. If it is running, it is all done.
C. Troubleshooting Spark
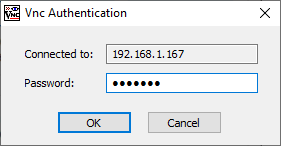
- Open TightVNC and type 192.168.1.167
![](http://employee.rpromise.com/wp-content/uploads/2019/09/14-1.png)
2. The password is CTB99#!
![](http://employee.rpromise.com/wp-content/uploads/2019/09/15.png)
3. The password is RPromise!
![](http://employee.rpromise.com/wp-content/uploads/2019/09/16.png)
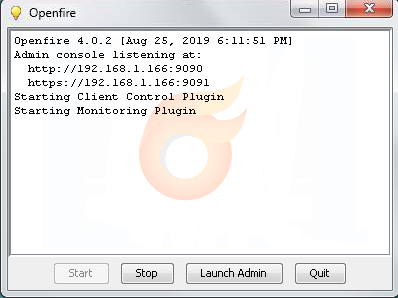
4. Open the Openfire Server
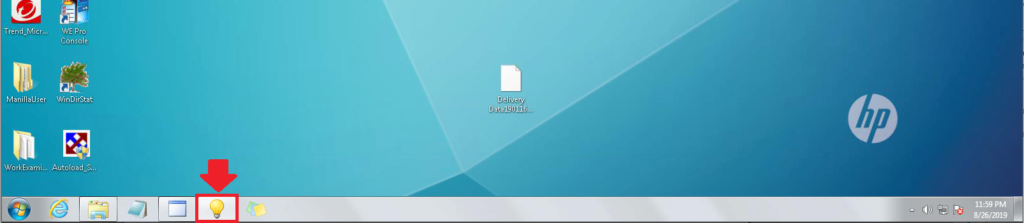
![](http://employee.rpromise.com/wp-content/uploads/2019/09/17-1024x223.png)
5. Click Start
![](http://employee.rpromise.com/wp-content/uploads/2019/09/18.png)
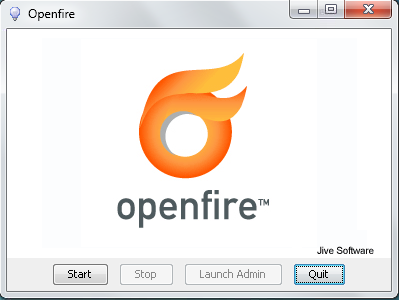
6. If you see this, it is all done
![](http://employee.rpromise.com/wp-content/uploads/2019/09/19.png)