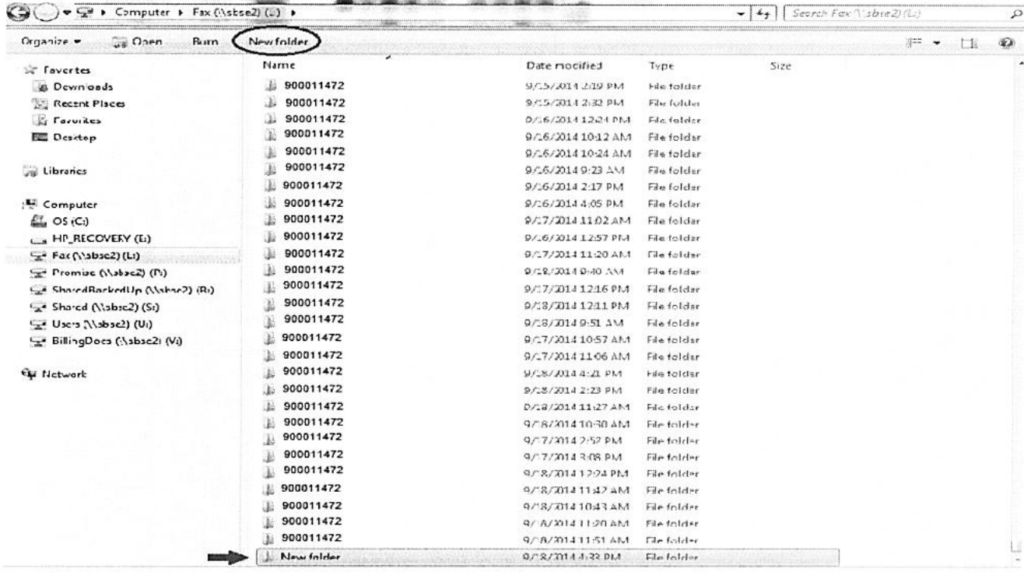
- Paste the consumer’s Customer ID Number into the file name (notice all of the other file names) so that the new consumer now has a file in the (L:) drive.
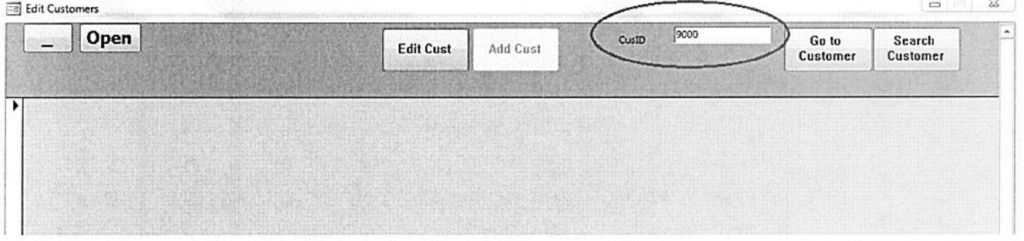
- Go back to the “Edit Customer’s” screen.
- Type in the Customer’s ID Number in the “CustID” field (located in the picture below):
SAVING SERVICE ORDER FROM INTAKE
- Representatives should go to the Main Form and select “Fax Blast”
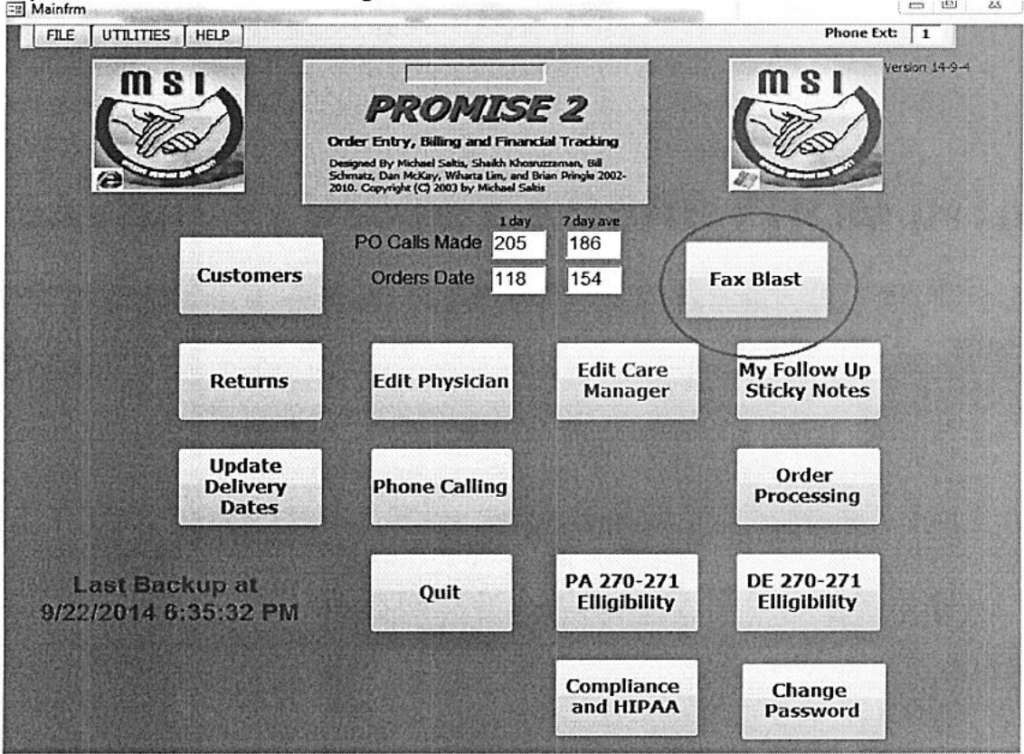
- A drop box will appear beside the “Fax Blast” icon, that says Outbox or Intake.
- Select Intake.
- The Intake screen will appear.
- Representatives should select “Non-RX Fax” (indicate in the picture below):
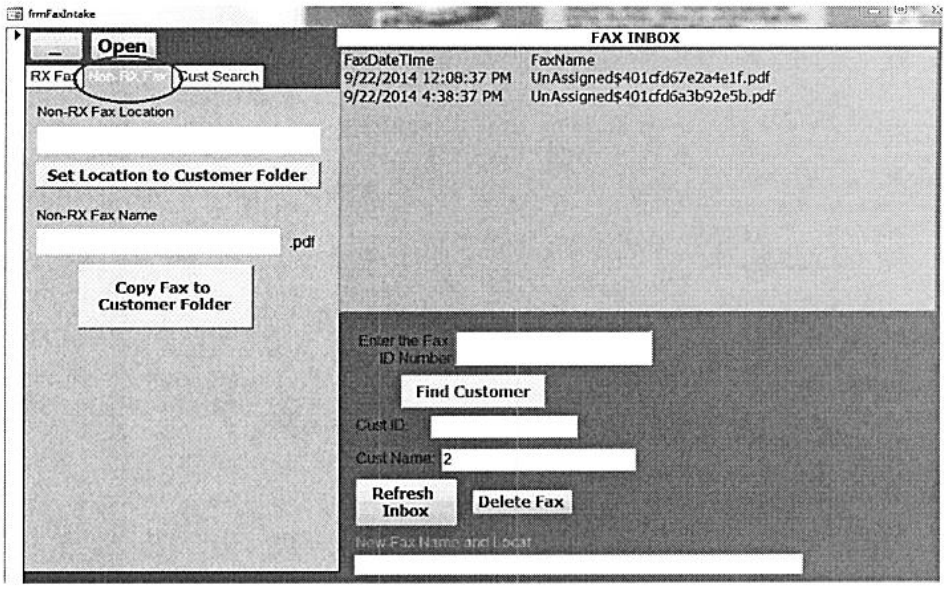
- Select which document in the “Fax Inbox” that needs to be saved.
- This area will become highlighted.
- Enter the Customer ID Number in the “Cust ID” section.
- Hit “Find Customer” button twice.
- The name will appear in the “Cust Name” section.
- Once the name appears, you hit “Set Location to Customer Folder”
- The Customer ID Number will appear in the “Non-RX Fax Location” area.
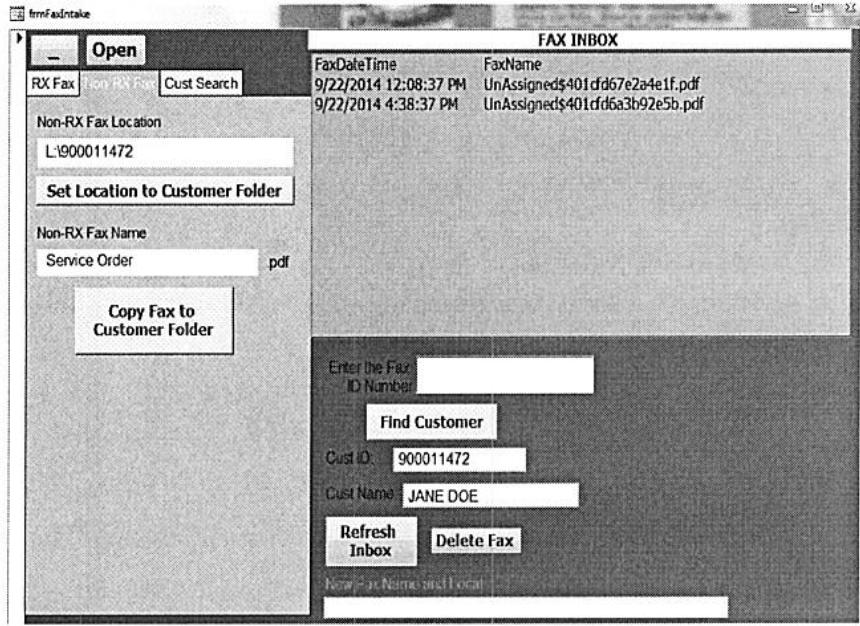
- In the “Non-RX Fax Name” enter how you want the selection to be saved and hit Copy Fax to Customer Folder.
- A pop up will ask representatives if they wish to delete the selection from the intake screen, select YES.
- Refresh the system (close out if the “Edit Customer” screen and go back in). Then go to the customer to make sure it was saved.
SAVING ELIGIBILITY IN THE SYSTEM
- Representatives should complete the following steps:
- Go in the RX Tab.
- Click on the “Add Above Customer folder to Clipboard” button (located in the picture below) Please note: Once you click on it, the text will become clack (confirms you selected it)
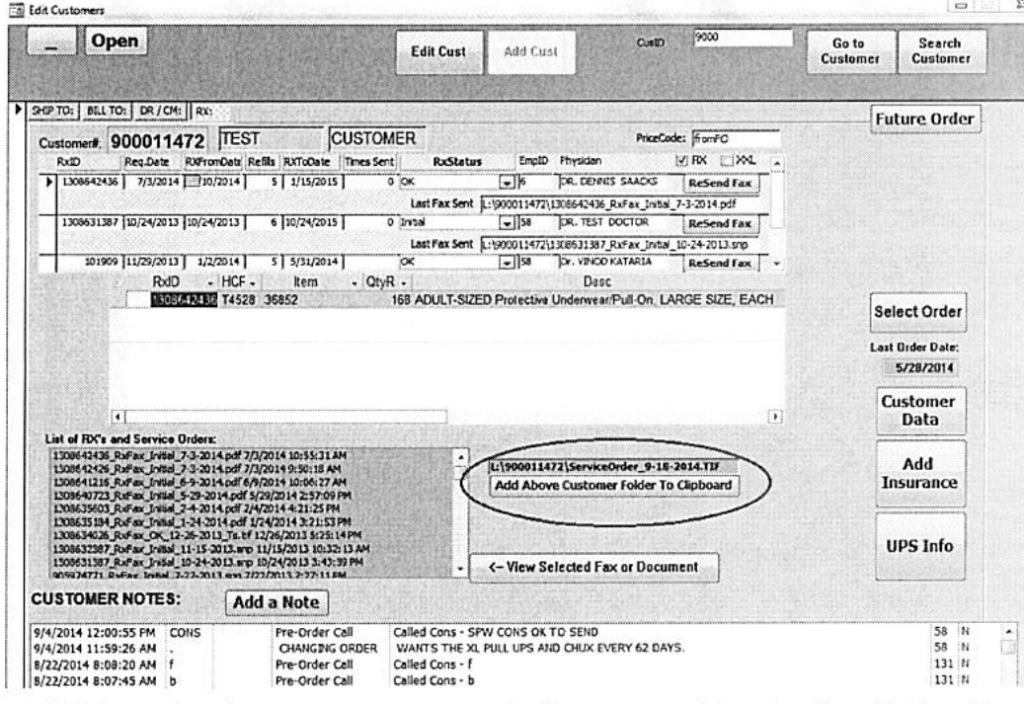
- After clicking the button, representatives needs to do following:
- Go back to the page that needs to be saved into the system (eligibility, Service Order, etc.)
- Right click anywhere on the page and choose “Print”.
- The Print box will appear.
- Scroll over the choose Primo PDF.
- Select Print.
- After following these steps the “Primo PDF” Screen will populate.
- Delete the link that is currently in the “Save As” line (located in picture below) then right click in the area and hit paste.
- Scroll over the choose Primo PDF.
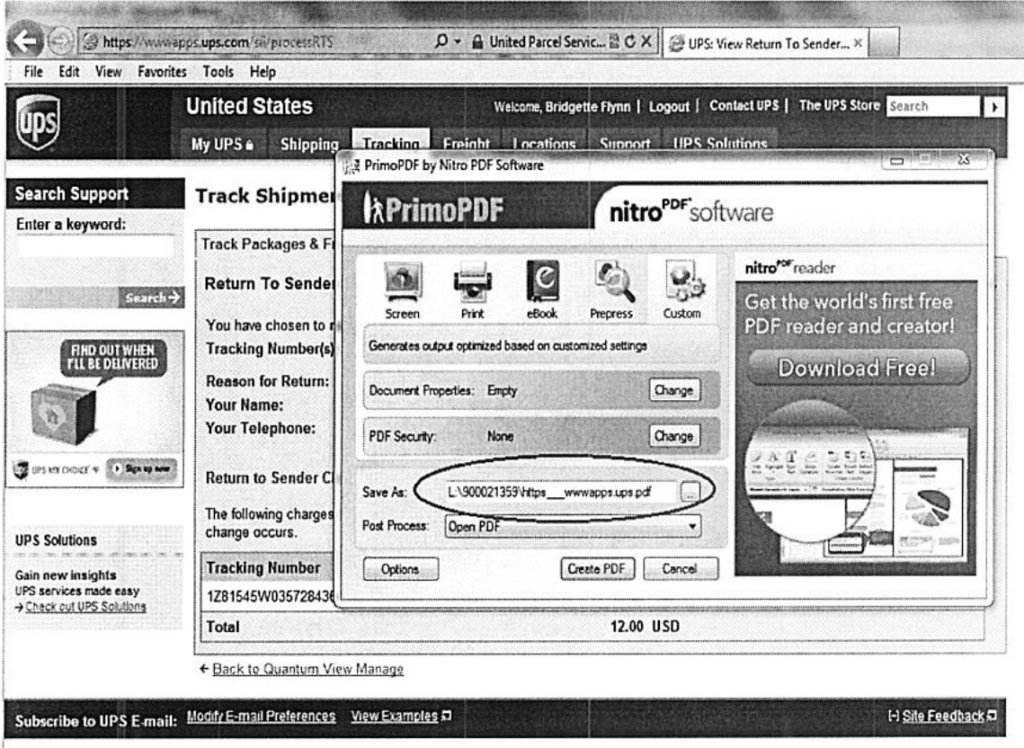
- The “Save As” line should now be a link that looks like the following:
- L:\ 900011472\ServiceOrder_7-18-2013.TIF
- Representatives should change all of the following in the link:
- The TIF needs to be changed to PDF.
- Delete “ServiceOrder” and write the appropriate heading in its place (PAMA ELIG, Service Order, etc.).
- If a representative properly follows these instructions, the link should now look like the following:
- L:\ 900011472\PAMA ELIG_7-18-2013.PDF
- Please note if the steps for the “Save As” line is not completed in EXACTLY this way, it will not save correctly.
- If the link is accurate representatives simply select “Create PDF”.
- If done correctly, screen will pop up showing the saved documentation.
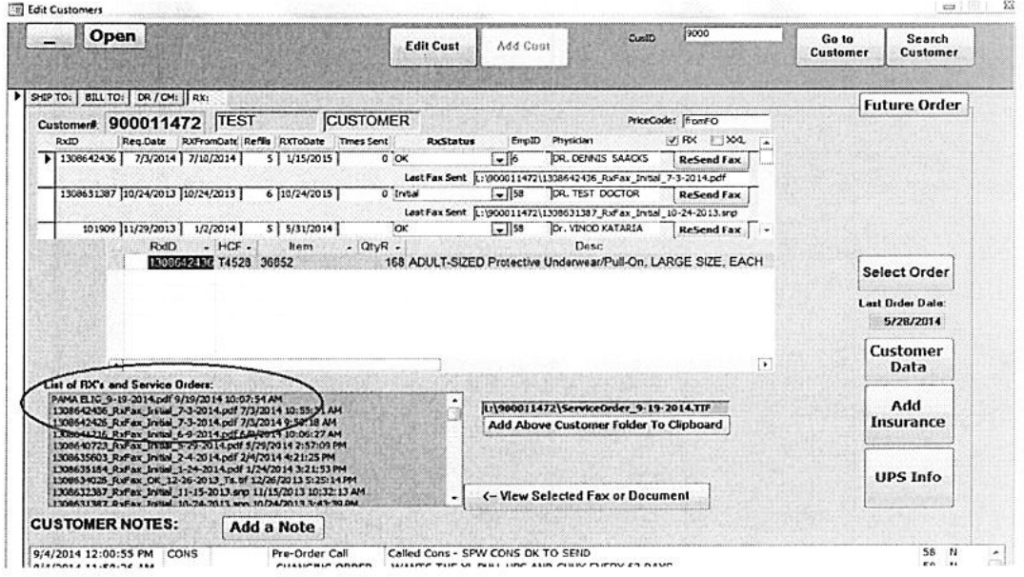
- Representatives can close out of the screen, and refresh their system.
- Once completed, the saved documentation should populate under “List of RX’s and Service Orders” in the “Edit Customers” screen on promise.
- Create a file for the patient.
- Using the label maker, indicate the patient’s Last, First and Middle initial (If any).
- Indicate the patient’s Customer ID number on the front of the file.
- Put the file in the “New Consumer” bin to be processed.
Pages: 1 2