- Open the CSR workstation via MS Access. The MS Access shortcut is right on the desktop. Click the shortcut and you will be prompted to log-in. Ask assistance from your mentor when accessing it remotely.
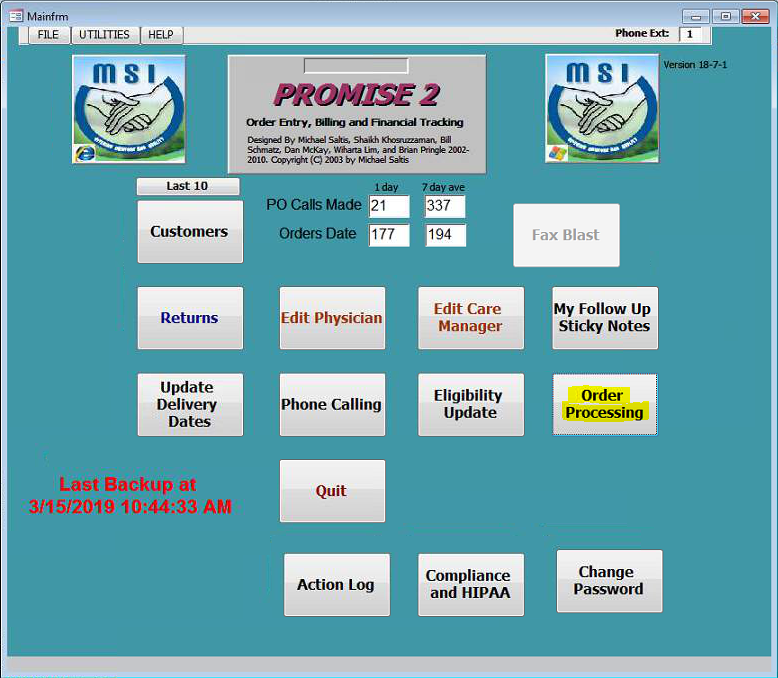
2. Press the Order Processing button to get to the Future Order Processing screen.
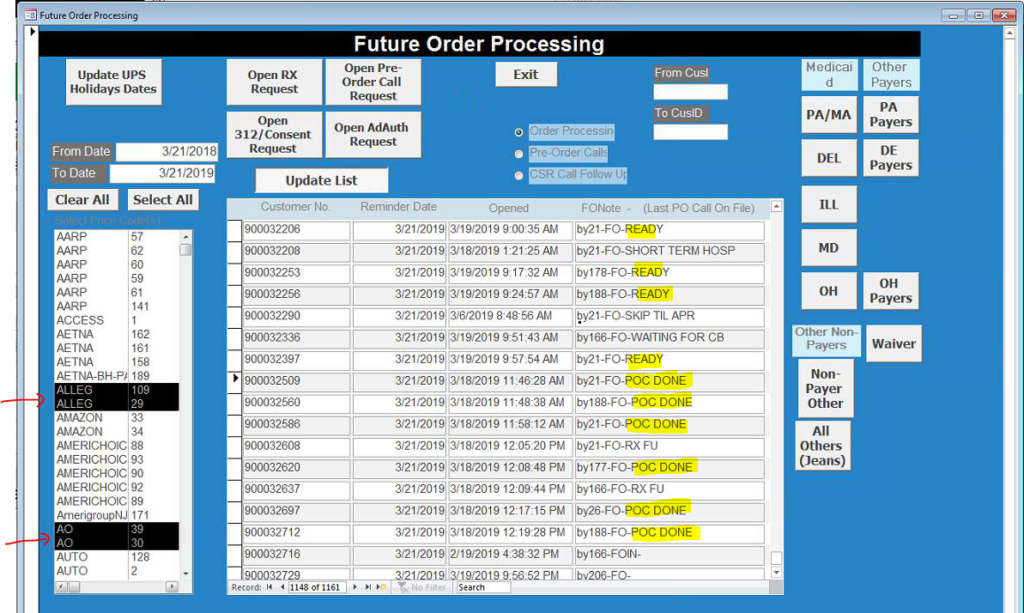
- Populate the TO date and FROM date (the date will range will be instructed by your mentor); delete the time stamp inside the white field.
- Highlight the following countries:
- ALLEG: 109, 29
- AO: 39, 30
- COUNTIES: 41, 40, 58
- MCAID-PA: 217
- MCO-PA: 197
- OPTIONS: 21, 20
- PA/MA: 56
- PCA: 22
3. Click the Update List button. This will show the cons that need to be worked on within the given date range.
– You will ONLY work on cons with FO note tagged as “READY” or “POC DONE”
– The best way to work on it is by ODD/EVEN tandem to ensure that no two billers are working on the same order at the same time.
– If you open a cons page and you see this bold red note below, this hint tells you that somebody has already worked on that cons and an order has been created. so you have to skip that cons that you opened and just open another cons

4. Double click on the cons# to open the cons future order creation page.
– Ideally, all the boxes (consent, FO detail. demographics, POC, ELIG, RX on file) should be colored “GREEN”. This means that an order is good to process and can be sent out for the month.
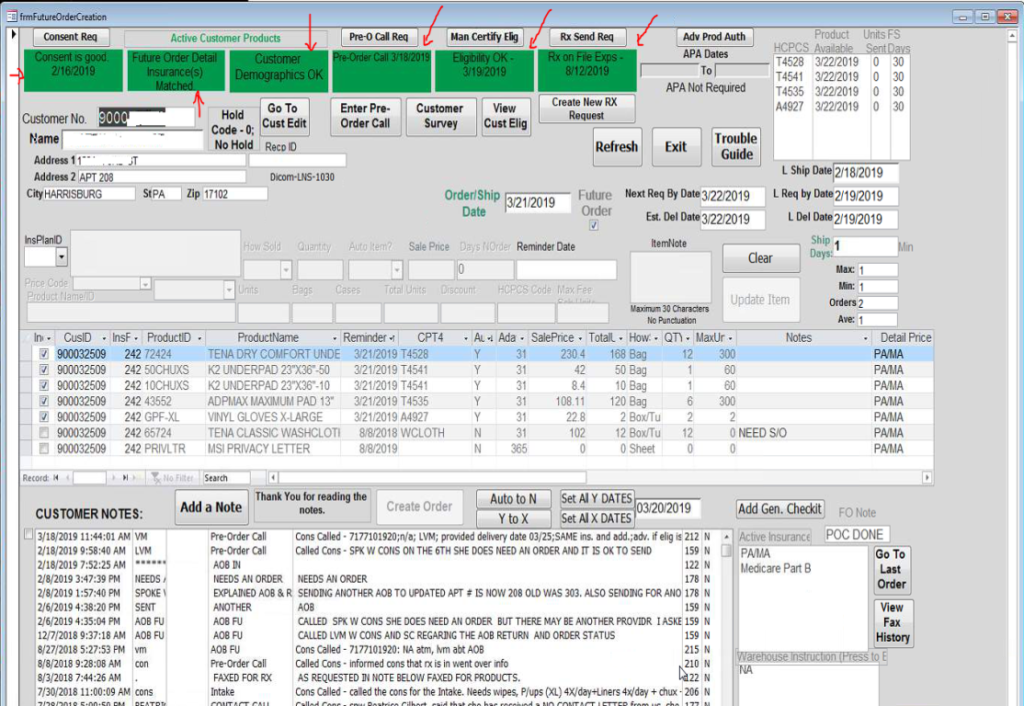
5. Look at the Customer Needs section and check/verify if there are completed POC notes made for the month. You can also check the notes in CSRWS so you can compare the notes side by side.


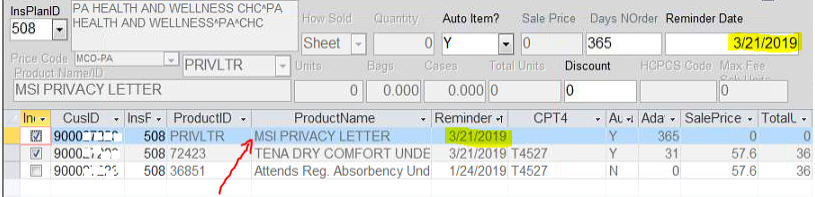
6. Look at the Reminder Date of the MSI Privacy Letter.
– If the reminder date of the MSI privacy letter is same as the month that you’re creating the order, tick the box to include the privacy letter to be sent along with the curent order. This means cons will receive another privacy letter to sign and complete (usually good for one year).
– If the reminder date is other than the current month, then skip this step and proceed with the next step.

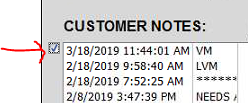
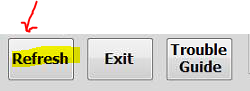
7. Once checked that the comments look okay and no further modifications are being requested by cons, tick the small box below the Customer Notes section and then click Refresh button.
– System will NEVER ALLOW you to create an order without checking the notes and ticking the box first.
– Check for any WAIVER ITEMS and BE MINDFUL if they are supposed to be sent along with the other orders or if they should be pushed a week prior, as per the authorized months stated in the service order. This impacts the payment and denial of the waiver billing.
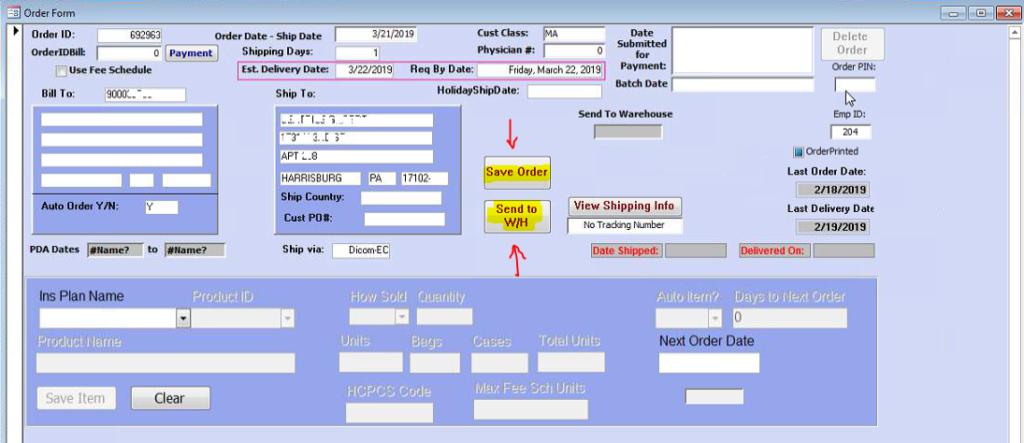
8. Click the “Create Order” button and this will open the Order Form.

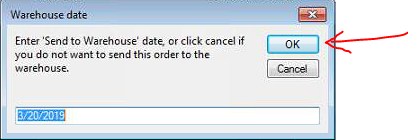
9. Inside the Order Form, click the Save Order button and then click the Send to W/H button. A confirmation box will pop up, just click OK.
10. The order processing will run in the background. DO NOT click on anything or play around with your mouse or cursor on screen as it may cause interruption of the order creation.
– The Thank You Letter/Order Form-Pack Slip will pop up. Wait until it automatically close.
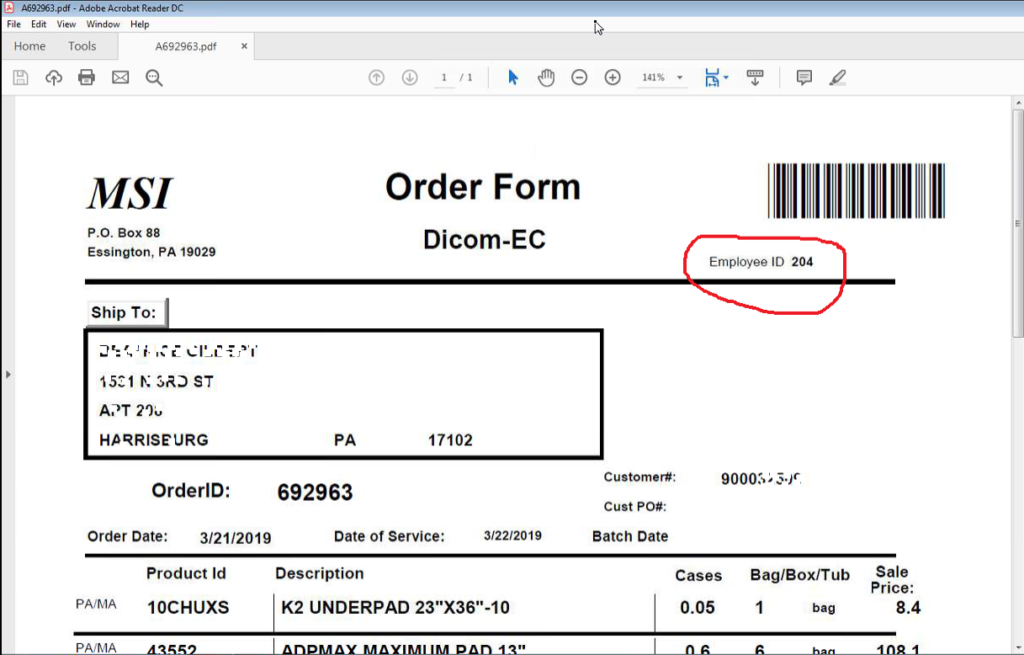
– Notice that the order form shows the employee# of the agent who processed the order.